Item Page Tools
Bulk Select & Other Speedups
Entering data into ScheduLearn can sometimes feel repetitive, especially when there are many similar items. The tools in this section are designed to help you work faster and more efficiently.
Duplicating Items
On every item page (Classes, Teachers, Subjects, etc.), you can duplicate an existing item. This is very useful when many items share similar details and only require small adjustments.
Duplicating creates an exact copy of the item, including:
- Assigned teachers or classes
- Lesson setup (if duplicating a subject)
- All constraints and scheduling rules
The only thing that changes is the color.
Example: If you were to duplicate a teacher whose calendar is blocked on Mondays, the duplicated teacher would also have calendar constraints on Monday.
How to Duplicate an Item
In Grid View: Click the three-dot menu on an item card and select Duplicate.
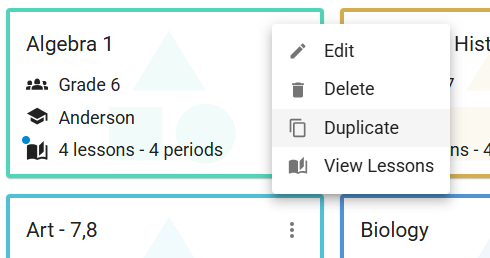 Figure 1 — Duplicating an item in Grid View
In List View: Click the Duplicate button highlighted in red.
 Figure 2 — Duplicating an item in List View
Important Notes When Duplicating
-
Classes Write me later. We may add the feature of the user decide to duplicate all subjects of the class (or just make that the default).
-
Subjects When duplicating a subject, all constraints are copied, including "subject relative constraints" such as “Not same day as ...” For example, if English 6 has a constraint preventing it from being on the same day as Literature 6, and you duplicate it to create English 7, the newly duplicated subject will still include that constraint. Review constraints after duplicating a subject.
Grid View and List View
Every item page can be displayed in either a Grid View (default) or List View. Switch between them using the Grid/List toggle button on the toolbar (circled in red in Figures 3 and 4).
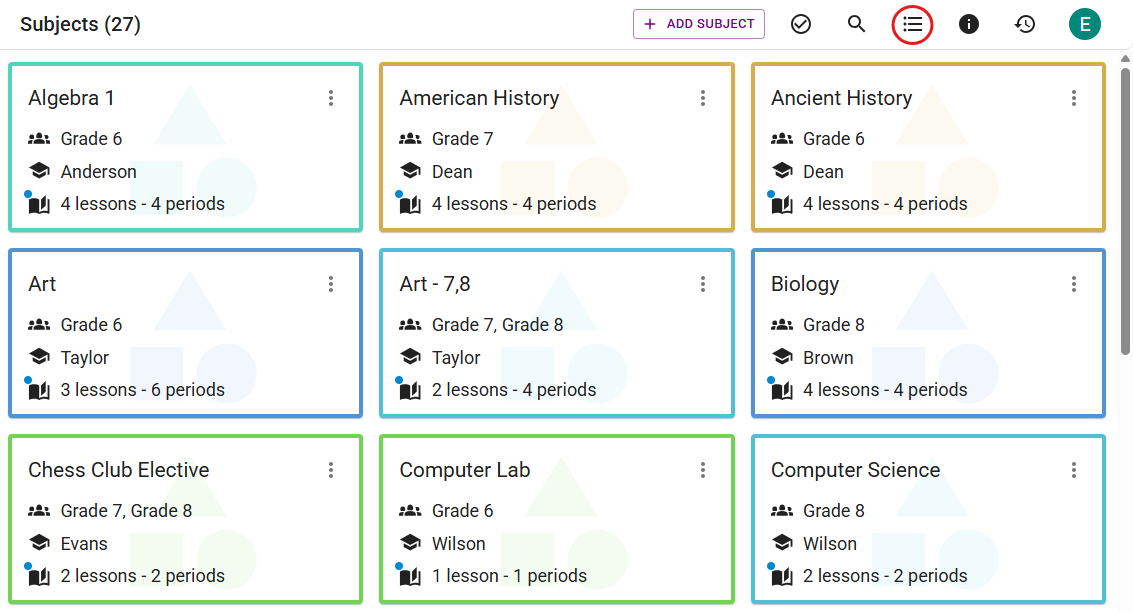 Figure 3 — Grid View
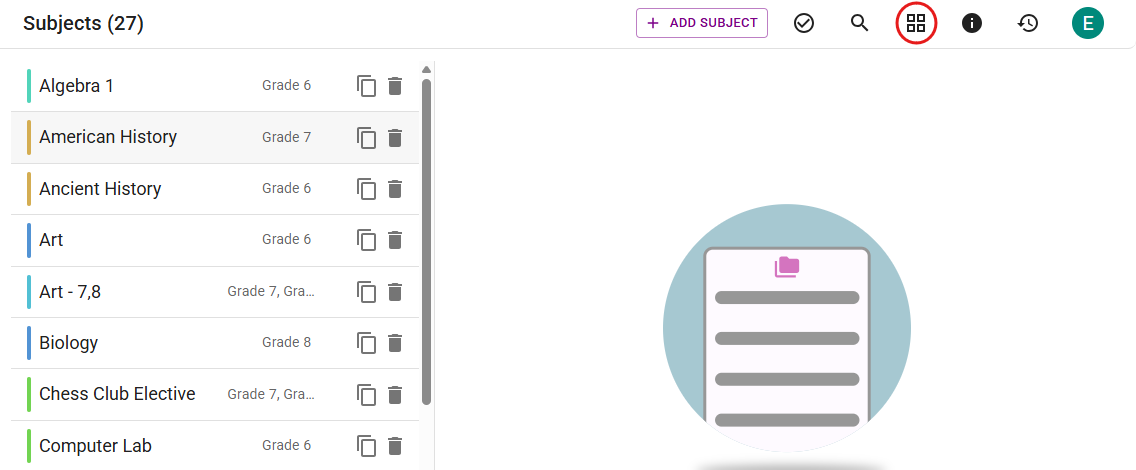 Figure 4 — List View
Filtering
Use the Filter tool to narrow down items to just those you need. Click the magnifying glass icon on the toolbar to show or hide filtering options.
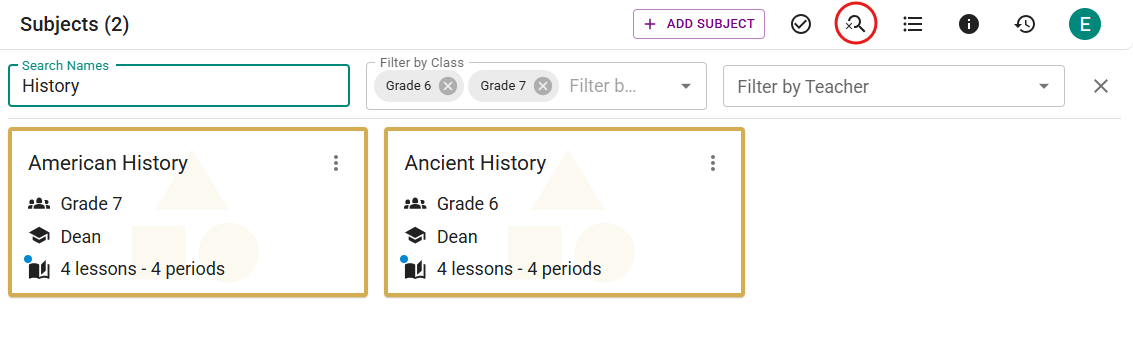 Figure 5 — Filtering items
Closing the filter panel clears all filters.
Bulk Actions
Bulk Actions allow you to modify multiple items at once — one of the most powerful ways to speed up data entry.
Enable Bulk Actions by clicking the checkmark icon on the toolbar (circled in red in Figure 6). A second toolbar (the bulk actions toolbar) will appear below the main toolbar. Click the checkmark again to turn Bulk Actions off.
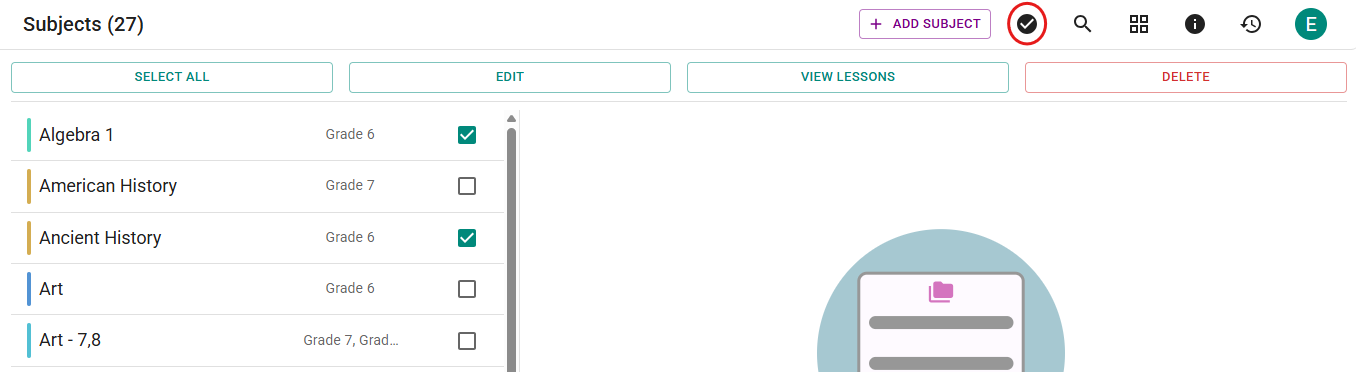 Figure 6 — Enabling Bulk Actions on the Subjects Page
While this example uses Subjects, Bulk Actions work similarly on Classes, Teachers, etc.
Once Bulk Actions are enabled:
- Checkboxes appear on each item (grid or list view).
- Select items manually or use filters to isolate a group, then click Select All on the bulk toolbar.
Example: If you want to modify all 6th grade subjects taught by Alan:
- Filter by Grade = 6
- Filter by Teacher = Alan
- Click Select All
There are 3 options of what to do with the selected subjects
- Delete — delete all selected subjects
- View Lessons — shows a view with each lesson from every selected subject (most users will have no need for this)
- Edit — Modify shared attributes or add constraints (see below)
Bulk Actions: Modify Attributes
You can modify multiple selected subjects at once:
When you choose Edit, you will see a modal:
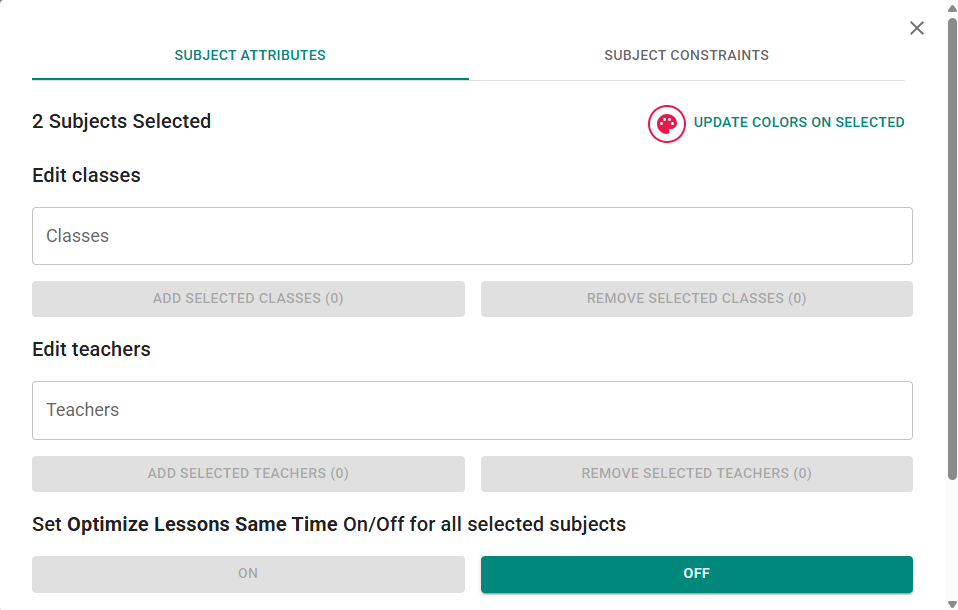 Figure 7 — Bulk editing subject attributes
Within this modal, you may:
-
Update Color Click the color swatch → choose a color → click Update Colors On Selected Subjects. There are a number of predefined colors to choose from, but you can also choose a custom color. That new color will then be saved to the end of the predefined colors for your convenience.
-
Modify Teachers Select teachers, then:
- Add Selected Teachers → assign to all selected subjects
- Remove Selected Teachers → remove from all selected subjects (Modifying Classes works the same way.)
-
Optimize Lessons Same Time Toggle On/Off. If an option is grayed out (as in Figure 7), all selected subjects already share that setting.
-
Set Lesson Spread Choose a lesson spread option → click Save
Once saved, the modal closes and Bulk Actions automatically turn off.
Bulk Action: Add Constraints
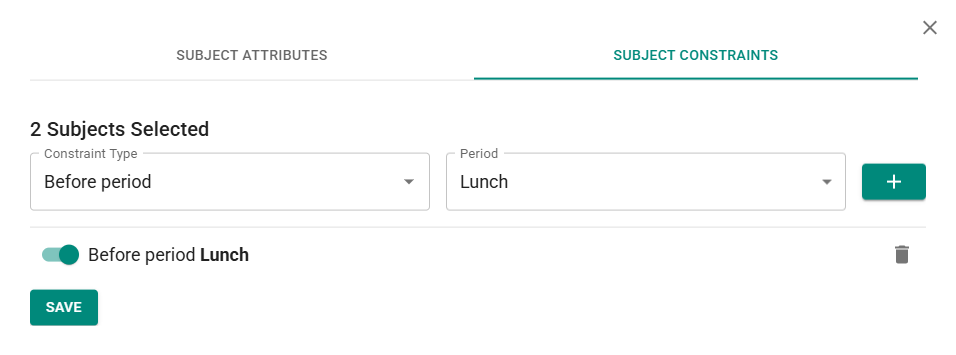 Figure 8 — Adding a constraint to multiple subjects
To add the same constraint to every selected subject:
- Enable Bulk Actions
- Select Subjects
- Choose Edit on the bulk action toolbar
- Go to the Subject Constraints tab
- Add constraints as usual
- Click Save
Currently, there is no bulk removal of constraints. If this would help your workflow, please let us know — user feedback drives our updates.